How to Merge Twitch, YouTube, Kick and TikTok Chat
Combine every platform's chat into one admin panel inside OBS and one clean overlay on your stream. The auto setup wizard does the heavy lifting — this walkthrough covers every click with screenshots.
What You're Building
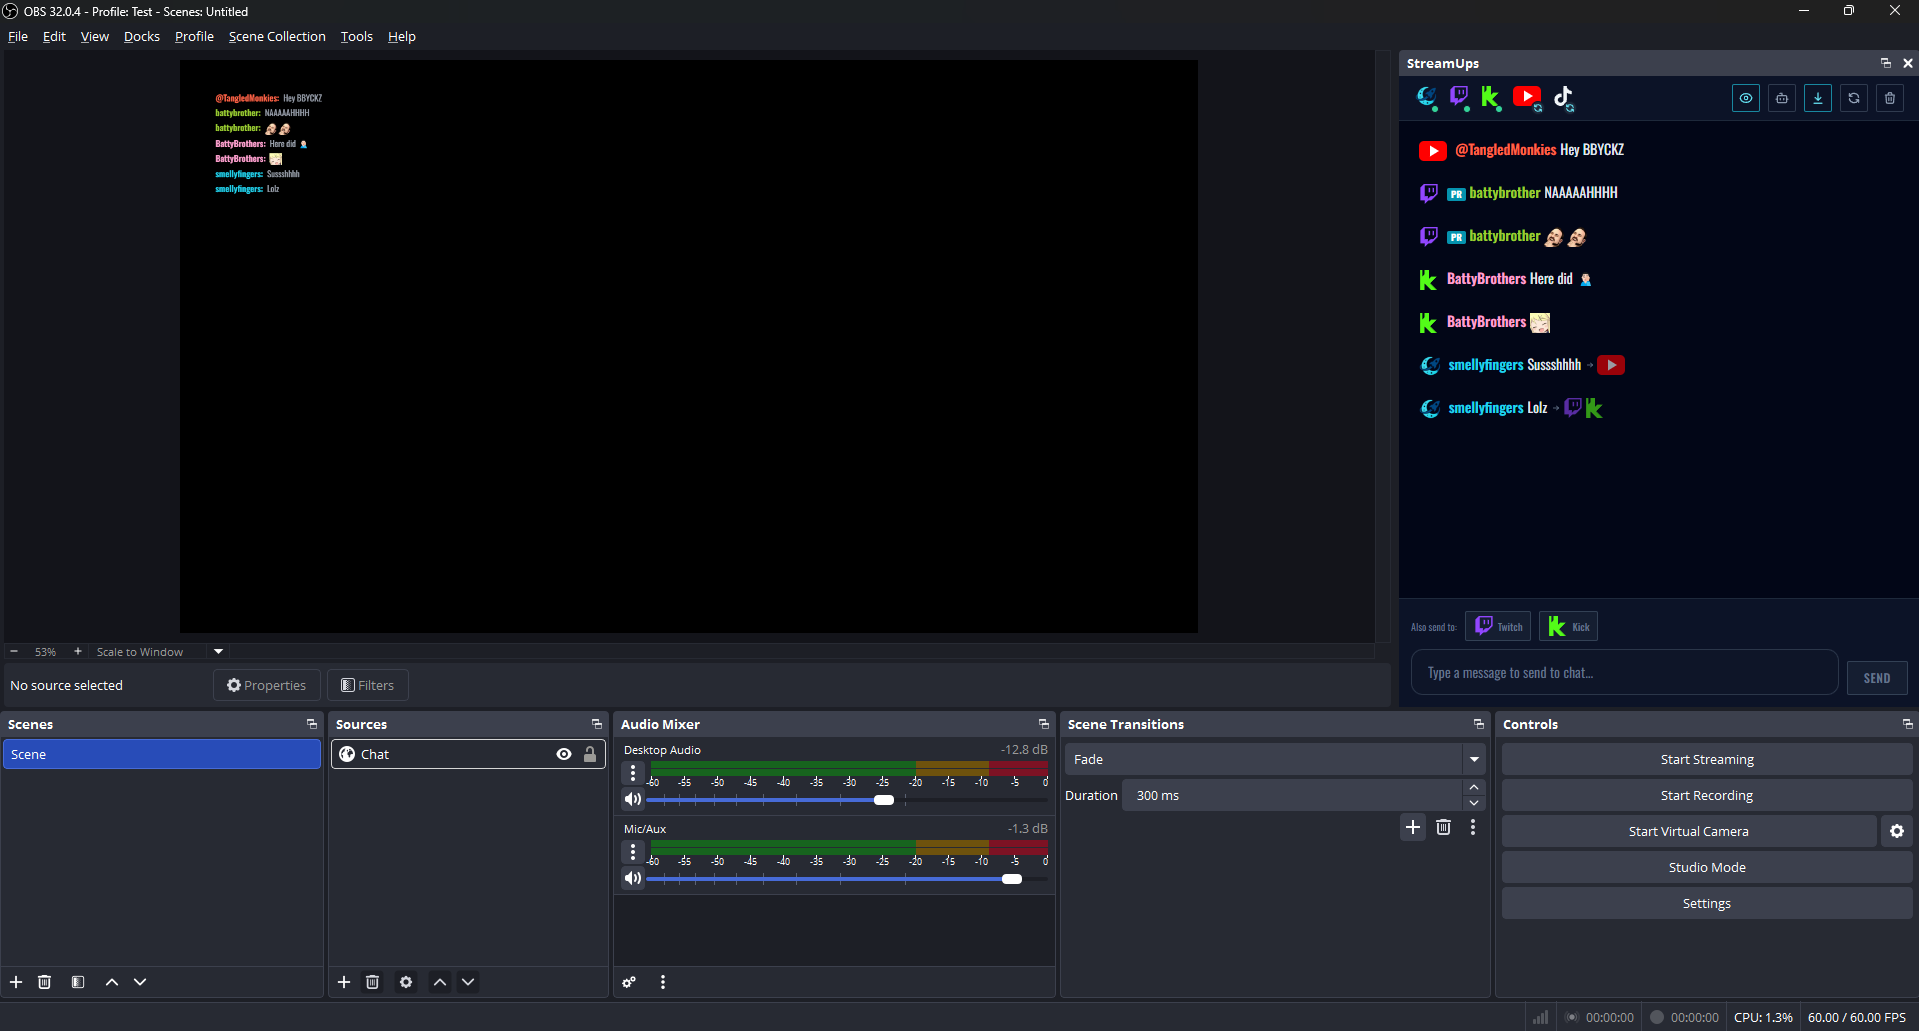
By the end of this tutorial your OBS will look like the screenshot below: the StreamUps admin chat panel docked inside OBS pulling in Twitch, YouTube, Kick and TikTok messages together, and a merged chat overlay sitting on your stream for viewers to see.
Before You Start: Create Your Account
You'll need a free StreamUps account. Once you've signed up you should land straight on the auto setup wizard — it walks you through connecting your platforms in one flow. If you don't see it, the Quick Startup button in step 1 opens it from anywhere.
Create Your Free AccountStep-By-Step: Merge Your Chats and Add Them to OBS
- 1
Open the Auto Setup Wizard
If you didn't land on the wizard right after signing up, click the Quick Startup button in your StreamUps dashboard. It opens the same guided setup from anywhere.
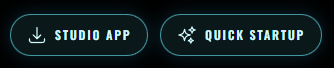
Step 1 — Quick Startup opens the auto setup wizard. - 2
Select Your Integrations
The setup window lists Twitch, YouTube, Kick and TikTok. Tick the platforms you stream to — you can pick all four or just the ones you use, and add more later.
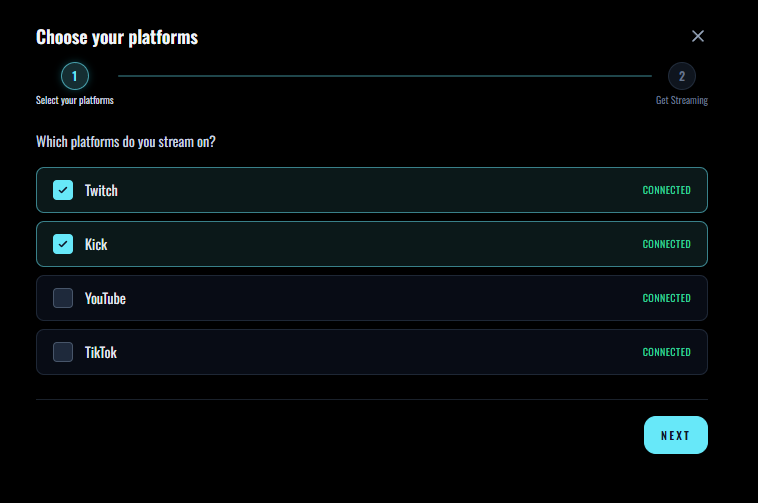
Step 2 — Choose which platform chats to merge. - 3
Copy Your URLs
The next screen gives you two links: one for your merged chat admin panel and one for your custom overlay. Copy both — the admin panel URL goes into an OBS dock in step 6, and the overlay URL into a browser source in step 11.
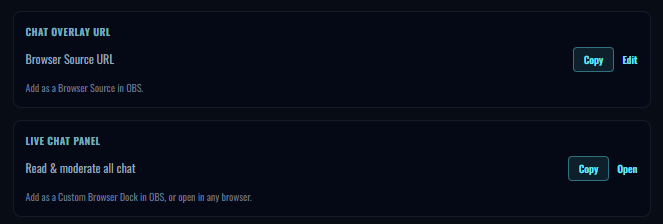
Step 3 — Copy the admin panel and overlay URLs. - 4
Know Where to Make Changes
This area of the portal is where you shape your chat later: add more integrations, run scripted live chats to boost engagement, customise the overlay to fit your style, moderate what reaches the overlay with keywords and masks, add AI conversations, and link your chat with another streamer to share chats while you stream — you see what they see, right on your overlay.
Learn more about scripted live chats, AI conversations, collab chat.
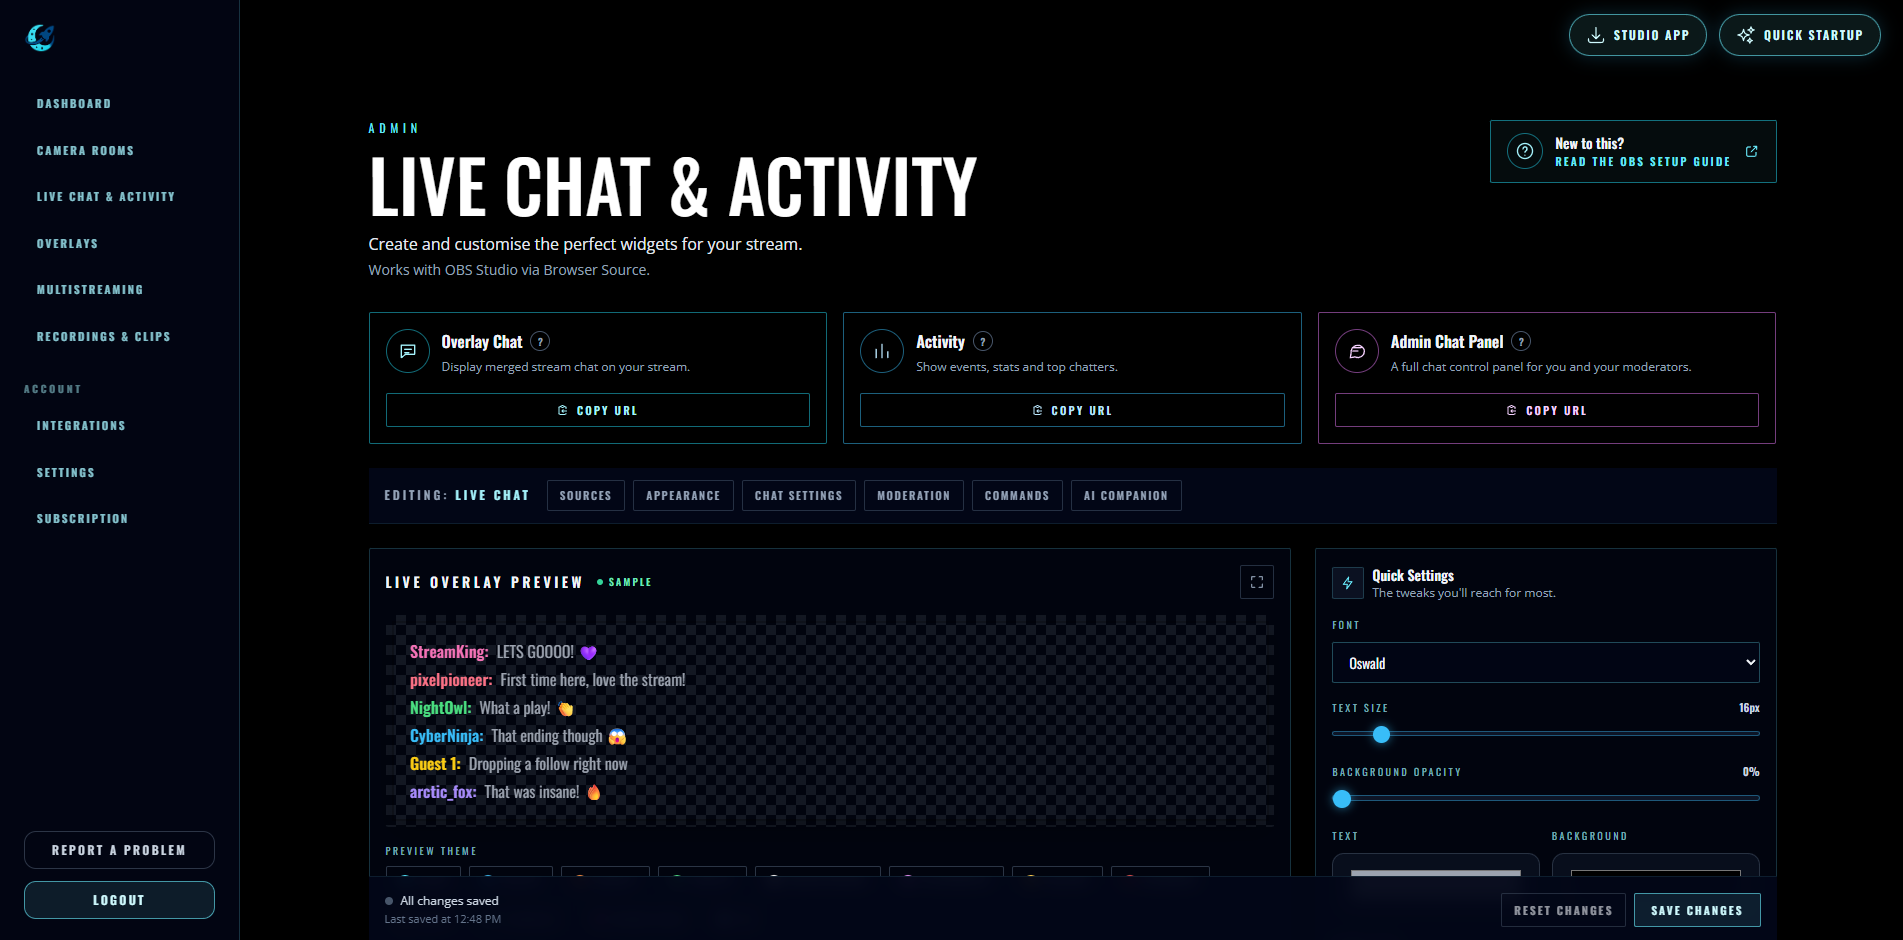
Step 4 — Everything about your chat can be tweaked here at any time. - 5
Add a Custom Browser Dock in OBS
Switch to OBS and open Docks in the top menu, then choose Custom Browser Docks. This is how the admin panel lives inside OBS instead of a separate window.
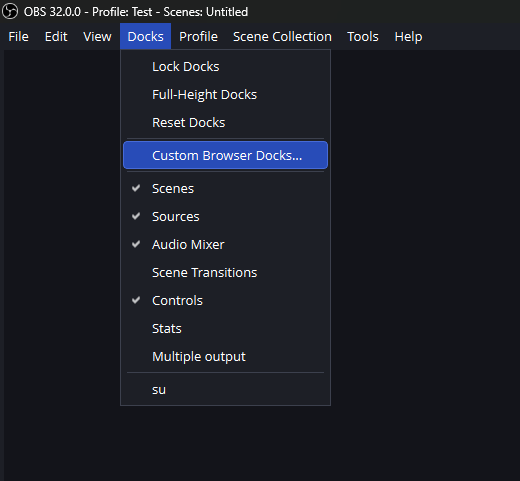
Step 5 — Docks → Custom Browser Docks in OBS. - 6
Name the Dock and Paste the Admin Panel URL
In the popup, give the dock a name like "StreamUps Chat" and paste the admin panel URL you copied in step 3. Click Apply.
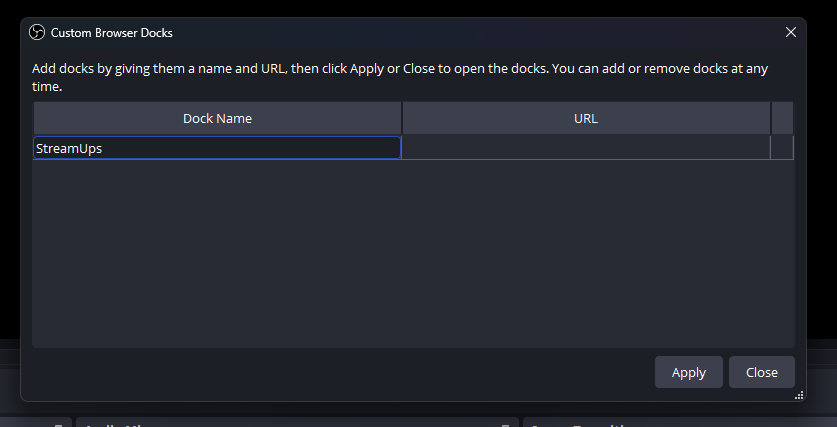
Step 6 — Name the dock and paste your admin panel URL. - 7
The Admin Panel Pops Out
OBS opens the new dock as a floating window with the StreamUps admin chat panel loaded inside it.
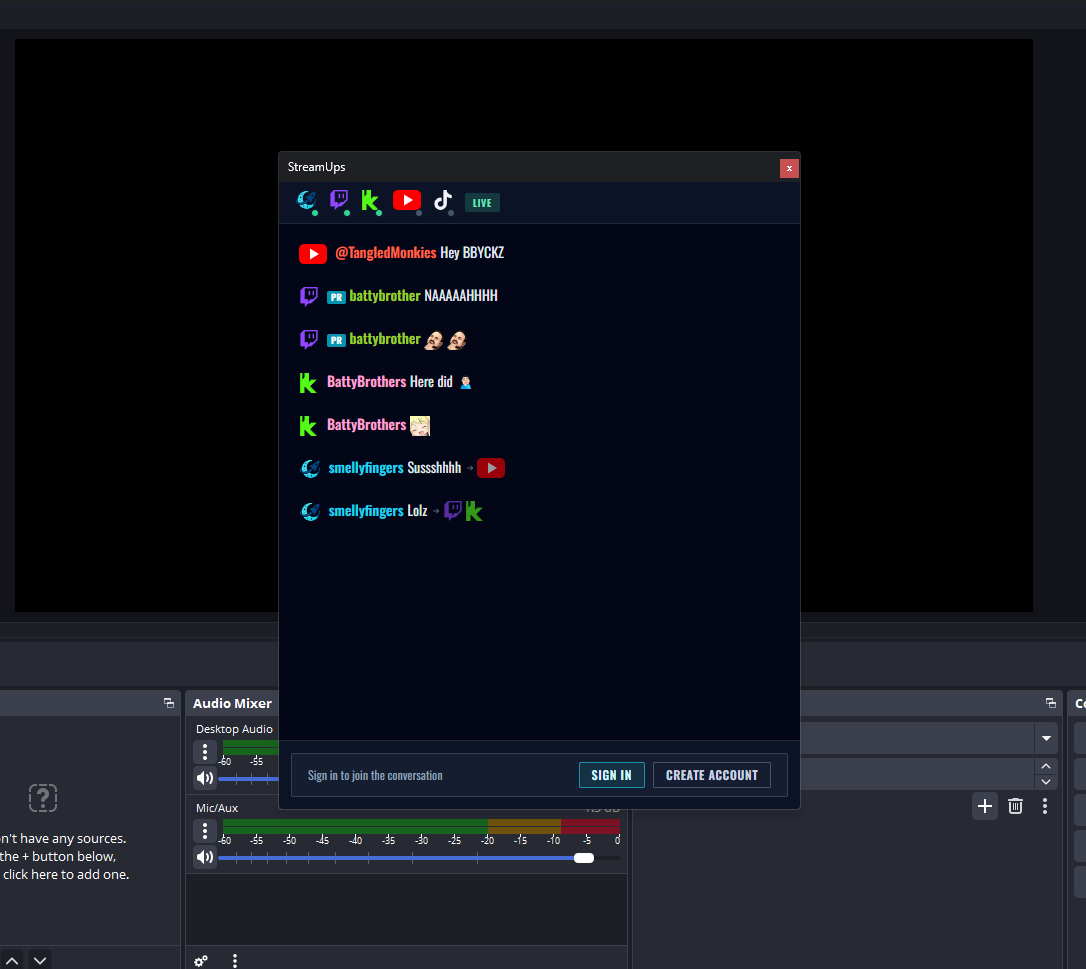
Step 7 — The dock pops out with your admin panel loaded. - 8
Dock the Panel and Sign In
Drag the floating panel into a space in your OBS layout — the side works well. Then sign in to StreamUps inside the dock so chats start flowing into your stream.
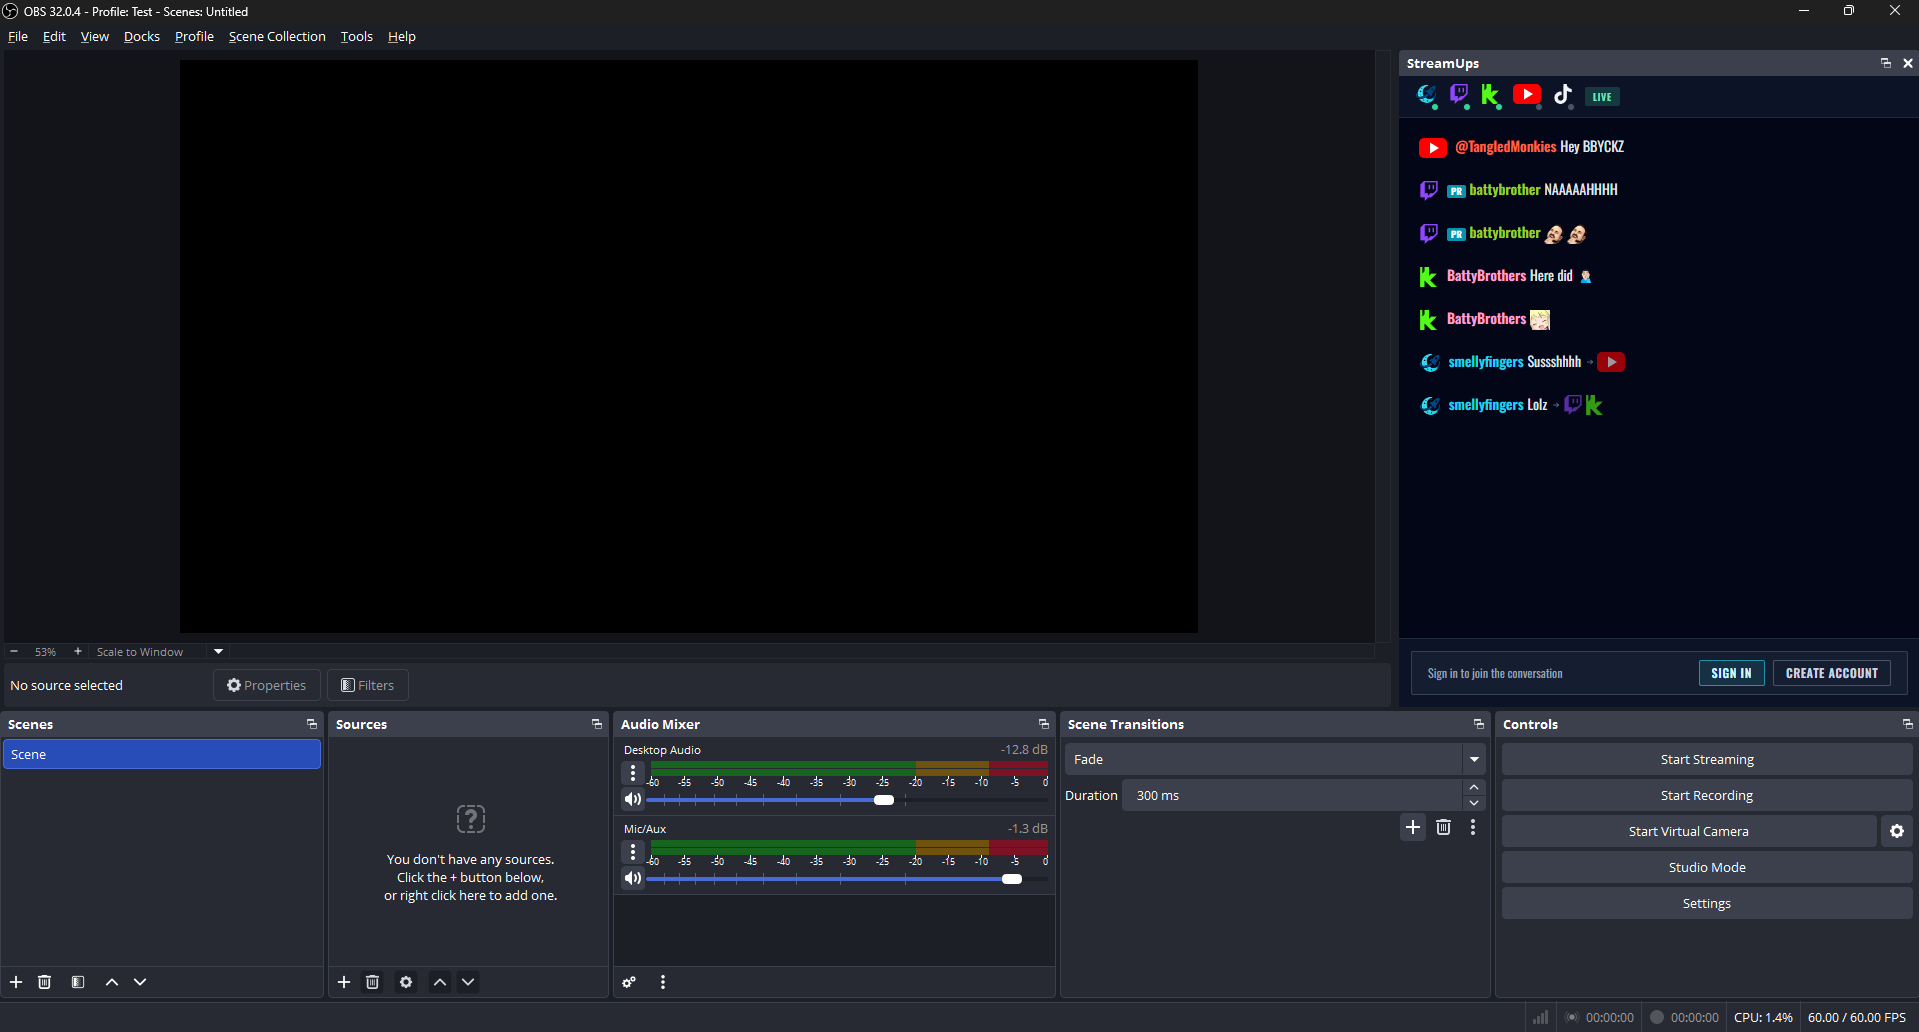
Step 8 — Dock the panel, then sign in to start receiving chats. - 9
Add a Browser Source for the Overlay
Now for the on-stream overlay. In your OBS scene, click the plus under Sources and choose Browser.
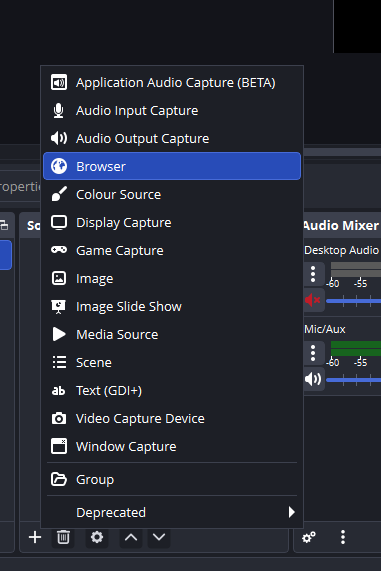
Step 9 — Add a Browser source to your scene. - 10
Name the Source "Chat"
Call the new source "Chat" so it's obvious what it is when you're managing your scene later. Click OK.
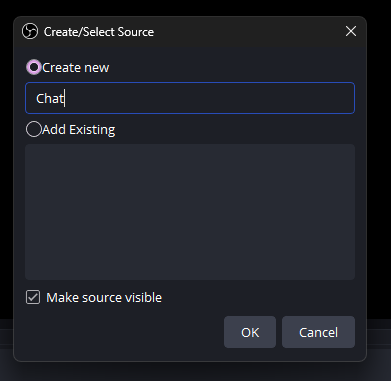
Step 10 — Name it "Chat" and confirm. - 11
Paste the Overlay URL
In the browser source properties, paste the overlay URL you copied from the StreamUps portal in step 3 into the URL field. Click OK and your merged chat overlay appears on the stream.
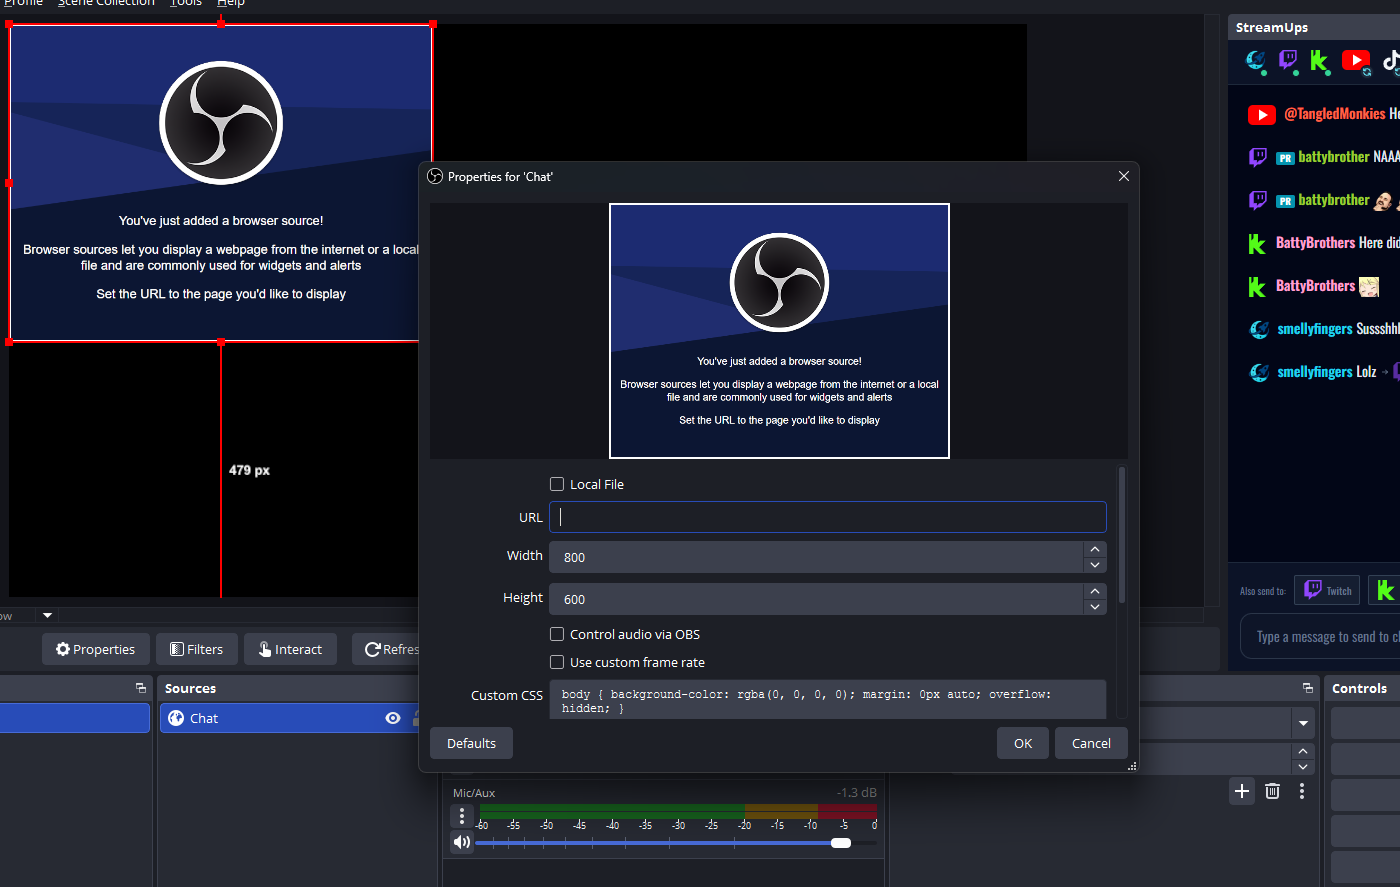
Step 11 — Paste the overlay URL and click OK.
The Finished Result
Hit Apply and you're done. Your admin panel sits inside OBS with every platform's chat merged into one feed, and your overlay shows a single clean chat to viewers — whether they're watching on Twitch, YouTube, Kick or TikTok.
Stuck on a step? The video walkthrough on YouTube covers the whole flow, or get in touch and we'll help you out.
Related Guides & Tools
Simplify Your Multi-Platform Streaming
Manage chat from Twitch, Kick, and soon YouTube in one unified control panel. StreamUps gives you the tools to focus on content, not platform juggling.